You have adjusted the chair a dozen times and it still feels wrong, because you have been adjusting it against a desk and a monitor that were never set for you either.
Picked on published fit specifications, each linked to its source. How we pick.
The short answer
Set it in this order: chair height from your body, then feet supported, then desk height to your elbows, then keyboard, then monitor last. Setting the chair to the desk rather than the desk to you is the single most common mistake, and no amount of fiddling with the chair fixes it.
We earn a commission if you buy through our links. It does not change your price, and it does not change our ranking. Prices are pulled from Amazon's own API and stamped with the date we fetched them — where we have no live figure, the button opens the current price on the retailer's page instead. Full disclosure.
Ranked picks with published seat height, seat depth and weight capacity
#
Product
Best for
Seat height
Capacity
Price
1
Steelcase Series 1
16.5-21.5 in seat height, 15.5-17.75 in sliding pan
#ad Seat height and capacity are the manufacturer's published figures, sourced under each pick. Prices come live from Amazon's own API and carry the date we fetched them; where a figure is missing the button opens the current price instead. Seat depth for every pick is in the spec block below. Seat depth summary: Steelcase Series 1 15.5"–17.75" · Steelcase Leap v2 15.75" · ComfiLife Premium Comfort Seat Cushion —
The order is the whole trick
Most setup advice is a list of positions - feet flat, thighs level, screen at eye height - and all of it is correct and none of it is achievable if you do it in the wrong sequence. Set the monitor first and you will set the chair to the monitor. Set the chair to the desk and you have set it to a surface built to a standard height for an average body.
The sequence runs from your body outward, and each step is fixed before the next one is touched:
1. Chair height - from your lower leg, not from the desk
2. Feet - flat on the floor, or on a footrest if the chair had to go higher
3. Seat depth and backrest - so the pan supports the thigh and the back reaches you
4. Desk and armrests - to your elbow height, both of them
5. Keyboard, then monitor - last, because they are the easiest to move
Step one: chair height, from your leg
Stand next to the chair and set the top of the seat pan level with the crease at the back of your knee. That is the starting point; fine-tune from there until your thighs are level or very slightly declined, with your hips at or above knee level. Do not look at the desk yet. The seat height lookup table gives the number from published anthropometric data if you want to check your eye, and is your chair too high or too low is the diagnostic if you are unsure which way you have gone wrong.
Step two: feet
Flat on the floor, with the weight through the heels rather than the toes. If setting the correct seat height left your feet dangling, the answer is a footrest and not a lower chair - lowering the chair re-breaks step one. Do you need a footrest covers when it is genuinely necessary, which is more often than people expect.
Step three: seat depth and backrest
Sit all the way back against the backrest. You want two to three fingers between the front edge of the seat and the back of your knee. If the pan slides, set it there; if it does not, you now know whether the chair fits you - the seat depth guide has the measurement and the chairs that adjust it is the list if yours does not.
Then the backrest. If its height adjusts, set the lumbar curve of the chair against the inward curve of your lower back - roughly at belt level for most people. How lumbar support should feel describes the target sensation: contact, not pressure.
Step four: the desk, and the armrests, to the same height
With the chair set, let your arms hang and bend your elbows to ninety degrees. That height is where the desk surface should be, and it is also where the armrests should be. A standard desk is about 29 in, which is right for a fairly narrow band of people and wrong for everybody else.
If the desk is too high, raise the chair and add a footrest, or fit a keyboard tray - what to do if your desk is too high runs through the options. If it is too low, raise the desk on risers rather than lowering the chair. Armrests that cannot drop to your elbow height should be moved out of the way entirely; do you need armrests makes the case that for many people they do more harm than good.
Step five: keyboard, then monitor
Keyboard flat or very slightly tilted away from you, close enough that your elbows stay at your sides rather than reaching forward. Mouse at the same height, on the same plane.
Monitor last, because it is the easiest thing in the room to move. Top of the screen at or just below eye level, about an arm's length away. The OSHA computer workstation guidance sets out the whole workstation geometry if you want the reference version. If the ache is between your shoulder blades rather than in your low back, this step is usually the culprit rather than the chair - the upper back page separates the two.
Then set the tension, and leave it alone
Recline tension should let you lean back under your own weight without either falling backward or fighting a spring. How to adjust tilt and recline covers finding the control, which on many chairs is an unmarked knob under the seat. Set it once, then give the whole setup two weeks before judging it - how long to get used to a new chair explains why day one is the worst possible time to form an opinion.
And if, having done all five steps properly, something still hurts, the setup has done its job: it has told you the chair is the wrong shape for you rather than merely badly adjusted. Common office chair problems maps symptoms to causes, and the full adjustment guide goes control by control.
The picks in full
1. Best for A chair with enough range to be set properly
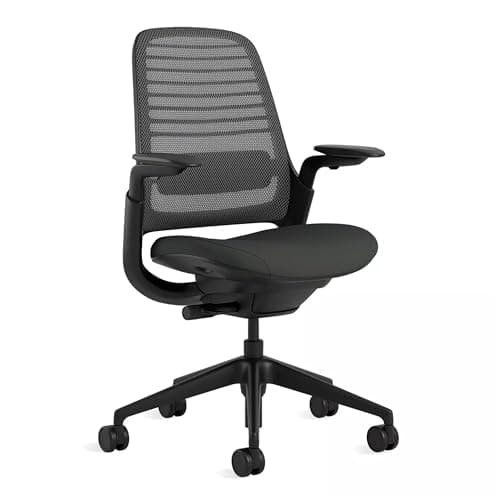
Steelcase Series 1
A setup guide is only useful if the chair has range to set. Steelcase publishes a seat height of 16.5 to 21.5 in and a functional seat depth of 15.5 to 17.75 in on the Series 1, which means steps one and three of this page are both actual adjustments rather than hopes - five inches of height and two and a quarter inches of pan length. Rated to 400 lb under a 12-year multi-shift warranty, with weight-activated tension as standard. Two things to know before you order: the pan floor of 16.5 in is still too high for many short sitters, and the adjustable lumbar is an option rather than standard, which matters for step five.
Who it fits
Anyone whose current chair has run out of adjustment at one end.
Who it does not fit
Anyone under about 5 ft 4 in. Anyone who needs lumbar height adjustment included as standard.
Published specifications
Seat height
16.5"–21.5"
Seat depth
15.5"–17.75"
Weight capacity
400 lb
Lumbar
Optional adjustable lumbar; weight-activated tension as standard
2. Best for Setting the lumbar, not just the height
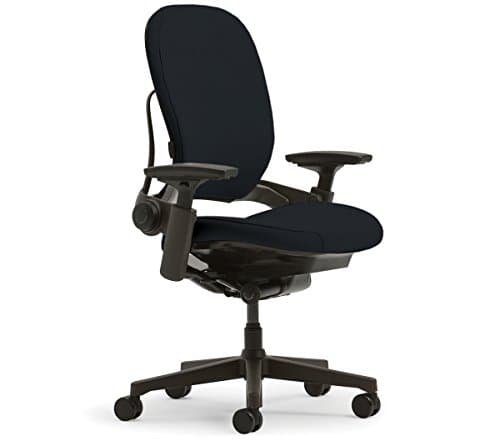
Steelcase Leap v2
The chair that makes the lumbar step of this guide a real step. Steelcase publishes a height-adjustable lumbar with a separate lower-back firmness dial - so after you have set the seat height and the pan, there is something left to set rather than a fixed contour to accept. Published seat height 16 to 20.5 in, a fixed 15.75 in pan, a 19.25 in seat width, a 25 in back height, arms 7 to 11 in above the seat, 400 lb capacity and a 12-year multi-shift warranty. The arm range matters more than it sounds for step four: arms that cannot drop to your elbow height will push your shoulders up all day.
Who it fits
Anyone who has set everything else correctly and still has a located ache.
Who it does not fit
Long-thighed sitters - the pan is fixed. Anyone outside the premium band.
Published specifications
Seat height
16"–20.5"
Seat depth
15.75"
Seat width
19.25"
Back height
25"
Arm height
7"–11"
Weight capacity
400 lb
Lumbar
Height-adjustable lumbar plus a lower-back firmness dial
3. Best for When the chair will not go low enough or high enough
ComfiLife Premium Comfort Seat Cushion
The cheapest way to change a setup you otherwise cannot. A firm cushion raises the seat by its thickness, which is the fix when the chair is at its top setting and your knees are still above your hips, and the U-shaped cutout takes the tailbone off the pan entirely. ComfiLife publishes 17.7 by 13.7 by 2.8 in of memory foam under a stated lifetime replacement guarantee. Two honest limits: raising the seat does not raise the armrests with it, so step four gets harder rather than easier, and this is a seat cushion - it does nothing whatsoever for lumbar support, which is a different product in a different place.
Who it fits
Anyone whose chair has run out of height, or whose tailbone is the complaint.
Who it does not fit
Anyone whose chair is already too high, and anyone whose complaint is in the low back.
Chair height first, from your lower leg rather than the desk. Then feet. Then seat depth and backrest. Then the desk and armrests to your elbow height. Keyboard and monitor last, because they are the easiest things to move.
Should I set my chair to my desk or my desk to my chair?+
The desk to the chair, always. A desk is built to a standard height for an average body; your chair is the adjustable part. Setting the chair to the desk is the most common setup mistake and it cannot be fiddled out afterwards.
How high should my monitor be?+
Top of the screen at or just below eye level, roughly an arm's length away, set last once the chair and desk are right. Setting it first means everything else gets set to the screen.
Where should the lumbar support sit?+
Against the inward curve of your lower back, roughly belt level for most people. The sensation you want is contact rather than pressure - if you are aware of it all day, it is set too firm or too far forward.
My feet do not reach the floor after setting the height. What now?+
Use a footrest rather than lowering the chair. Lowering it undoes step one and puts your knees above your hips, which tips the pelvis backward and flattens the lumbar curve.